Monday 28 July 2014

Linux Kernel Programming- Step2 (First Program) Writing & compiling a simple hellokernel module

Now that we have setup our playground (read ready to start programming), we can move on to writing a small program for kernel. There are two ways to add your program to the kernel.
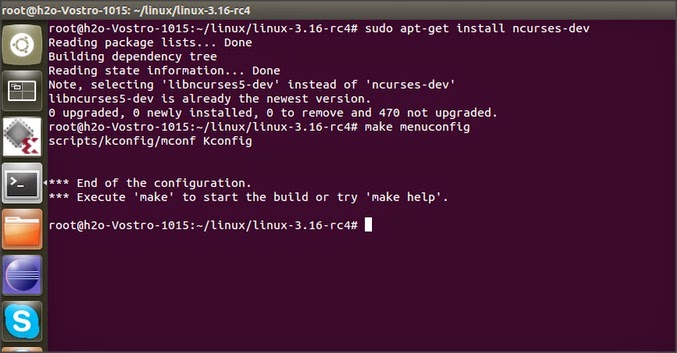
  1. Write a source code and add it to kernel source tree and recompile the kernel, kernel configuration is used to choose which files to be included in kernel to compile.
  2. Write a loadable kernel module- which can be loaded and unloaded into kernel dynamically without the need to recompile the kernel.
These loadable kernel modules can do a lot of things, mainly they are in one of these three forms 
1) device drivers 2) filesystem drivers  3) system calls.

following the tradition of writing "helloworld" program  whenever we start learning any new language, we are going to write a simple hellokernel.c program, and compile this program to generate a .ko (kernel object) file which can be added to the kernel by certain commands.

  • Create hellokernel.c file 

make a directory for saving your kernel programs, and create a file named hellokernel.c using gedit, or any of your favourite editor,

gedit hellokernel.c 

printk(KERN_INFO,"message")
KERN_INFO is one of the many log levels present, this macro provides kernel with information about the severity of messages. depending on loglevels it might print on console as well, you can try the KERN_WARNING macro for that.
Available Loglevels
Loglevel
Description
KERN_EMERG
An emergency condition; the system is probably dead
KERN_ALERT
A problem that requires immediate attention
KERN_CRIT
A critical condition
KERN_ERR
An error
KERN_WARNING
A warning
KERN_NOTICE
A normal, but perhaps noteworthy, condition
KERN_INFO
An informational message
KERN_DEBUG
A debug message typically superfluous

in absence of any loglevel, kernel will take it as  DEFAULT_MESSAGE_LOGLEVELwhich is currently KERN_WARNING.

  •  Create Makefile


make command checks for makefile in the directory, Makefile is the file through which you tell compiler about which files are to be included for build, it contains detail about target, dependency & rules for generating the output file.

gedit Makefile

obj -m as target specifies that we need a kernel object module from hellokernel.o file, KDIR macro contains the path to the library files required for compilation.

here is an detailed tutorial for make & makefile Makefiles-in-Linux-An-Overview

  • run make command

make

 If the make command is successful in compiling the hellokernel.c file, then it will generate various files, 


one of the files will be "hellokernel.ko" file. this is the kernel object file, which can be inserted into the kernel without the need to recompile the whole kernel source.


  • Inserting module into Kernel


The kernel object file generated in previous step can be loaded into kernel using insmod command, one will need to have root password to insert the module( using sudo)

sudo insmod hellokernel.ko

  • Removing Module from Kernel


The kernel object added can be removed from the kernel as well, for this we need to use-

sudo rmmod hellokernel.ko


  • Verifying module insertion & removal

After the module is successfully inserted or removed from kernel we can check the messages  by dmesg command, remember in c file we wrote "printk" function, this function does not print on console but on the kernel log file, to check the kernel log we have to use dmesg command.

dmesg


this indicates successful insertion and execution of module from kernel.

Saturday 19 July 2014

Linux Kernel Programming- Step1-(Environment setup) Installing kernel from source in ubuntu

Generally setting up "an environment to work" is of utmost relevance which affects the outcome of the efforts we are putting in,it is the also an barrier which we need to overcome to indulge our curiosity and dwell further into something we are actually interested in.

objective -setting up an environment to begin Linux kernel programming


Things required- internet connection, basic knowledge of executing commands in terminal


1. CHOOSE

there are two ways one can move, 
  1. Install a new kernel over the existing installation. pros of this option is that you will have a backup kernel to boot into in case your experiments with the kernel go awry and test kernel crashes. If you find yourself unable to boot into the experimental environment kernel), you can always boot into the kernel os which you were not fiddling with.                      
  2.  Experiment with the existing kernel (the one running your OS right now!)   one can go for this option if  saving memory is prime concern and also if you want to start poking your nose into kernel right away without spending any time on setting test environment, but beware any wrongdoing on your part might result in os crash.

I would recommend for the first one as it allows us to understand and learn how can a kernel be compiled from source.


2. DOWNLOAD


       note- even numbered versions are stable whereas odd numbered are the ones on which debigging and development is in progress. you can download any one of the even numbered linux kernel source code, I downloaded
mainline: 3.16-rc4 2014-07-06 [tar.xz]

  •  Create a directory, preferably in home folder  for ease of navigation in terminal 

  •  move the downloaded tar.xz file in linux folder and unzip it using

now in terminal; navigate to the linux directory where source file is extracted and then run all the following commands as super user(SU) from same directory.

3. CONFIGURE KERNEL 

(find it too lengthy and boring? then u can skip it by just running a command
 make defconfig and move on to next step)

"make" -  Linux manual page  says " The purpose of the make utility is to determine automatically which pieces of a large program need to be recompiled,  and  issue  the commands  to  recompile  them." 
In case of Operating system which is a collection of large number of programs, when any modification is made (adding a device driver, removing a bug etc.) then to identify which modules need recompilation and for which  it can be avoided, make utility  is used.
make command searches for a file named makefile in the directory, this makefile has the information about file dependencies and contains the command to compile each file.
as we are compiling the kernel we need to "make" some of the files in order to compile the kernel source code.
configuration- as the word indicates it is configuring the kernel, what features you want in your new kernel and what you don't. for example wireless network support etc.
some of the options available to create the .config file which store the configuration
make config will ask user to choose from many options, it will take many hours to configure if someone opts for this path.
   
it takes the default settings (like most common installation settings) and writes to .config file,  that too quick

it presents an graphical interface to choose which options you want. if u encounter error while you run make menuconfig command   then you need to install libncurses in your system, 
you can install it using 


after installing ncurses you can run make menuconfig, you will get the screen like following image

just for an example if u dont want to have wireless connectivity or network connectivity of any sorts for that matter, you can uncheck the  box next to Networking support option.

4. COMPILE

now that we have configure the basic settings and customized the things we want in our kernel/os with the help of configure step, we can move on to compiling the source code, compilation will be done according to the customizations that we have done in previous steps.

a.   kernel 


 b.   modules 


c.   install kernel modules


5. INSTALL KERNEL


6. CHECK


     reboot the system and select "advanced boot options" from boot menu and there you can see the additional option to boot into.
this new kernel will have exactly same interfaces as you had in your earlier version, to check the version, you can run uname -r command which will display the version.

now we have a separate kernel where we can add our own modules and experiment with it!

Monday 10 February 2014

Debugging a C program on Linux using gdb

At times to understand a program we need to run the program at our speed of understanding i.e. one instruction at a time. this can be achieved quite easily in windows with help of various IDEs.  but for a beginner like me debugging a C code via terminal in Linux  can appear to be a very daunting task, but its not. In fact in Linux we can debug the code without installing the heavyweight IDEs, with help of gdb- GNU Debugger.

Suppose my program name is prog.c then for compiling this c program in Linux Terminal one would give the following command,
gcc -o prog prog.c 
But  we will need to add another argument -ggdb to existing command
to include GNU debugger, while compiling
gcc -o prog prog.c -ggdbg
run gdb
gdb prog

on running gdb the following can be seen on terminal

h2o@h2o-Vostro-1015:~/C$ gdb lab3
GNU gdb (GDB) 7.5-ubuntu
Copyright (C) 2012 Free Software Foundation, Inc.
License GPLv3+: GNU GPL version 3 or later <http://gnu.org/licenses/gpl.html>
This is free software: you are free to change and redistribute it.
There is NO WARRANTY, to the extent permitted by law.  Type "show copying"
and "show warranty" for details.
This GDB was configured as "i686-linux-gnu".
For bug reporting instructions, please see:
<http://www.gnu.org/software/gdb/bugs/>...
Reading symbols from /home/h2o/C/lab3...done.
(gdb)

using gdb now we can do various tasks, some of them include
1.disassemble- converting c code to assembly code
2.list- see the first 10 lines of prog
3.add breakpoint and debug
4 printing variable value while program is executing in single stepping mode.

 disassemble

 Program can be disassembled using disassemble <function_name>
for example disassemble main would yield the following result,

(gdb) disassemble main
Dump of assembler code for function main:
   0x0804840c <+0>:    push   %ebp
   0x0804840d <+1>:    mov    %esp,%ebp
   0x0804840f <+3>:    and    $0xfffffff0,%esp
   0x08048412 <+6>:    sub    $0x20,%esp
   0x08048415 <+9>:    movw   $0x73,0x16(%esp)
   0x0804841c <+16>:    movl   $0x5,0x18(%esp)
   0x08048424 <+24>:    cmpl   $0x9,0x18(%esp)
   0x08048429 <+29>:    jg     0x8048432 <main+38>
   0x0804842b <+31>:    mov    $0x8048518,%eax
   0x08048430 <+36>:    jmp    0x8048437 <main+43>
   0x08048432 <+38>:    mov    $0x804851e,%eax
   0x08048437 <+43>:    lea    0x16(%esp),%edx
   0x0804843b <+47>:    mov    %edx,0x4(%esp)
this is for advanced programmers, to extract pin point precision details of their program's execution.

setting breakpoint in program & debugging

from gdb we can see our program and add breakpoints to it for debugging, 
'list' command prints the first 10 lines of code,
'list main' would yield result

(gdb) list main
1    #include<stdio.h>
2    #include<stdlib.h>
3    int main()
4    {
5        char str[]= "s";
6        int a=5;
7        printf(a<10? "%50s\n":"%s\n",str);
8   
9    int i=2;
10    printf("\n%d%d\n",++i,++i);
 here we can see that the code is printed along with line number, so suppose if we want to add a breakpoint before printf, so we will need the corresponding line number (7 in this case) and using following syntax we can add the breakpoint
  • break [file_name]:line_number
  • break [file_name]:func_name
break 7
(gdb) break 5
Breakpoint 1 at 0x8048415: file lab3.c, line 5.

This places break point in the C program,at the corresponding line number. While executing the program, the debugger will stop at the break point, and gives us  the prompt to debug.

Now we can run the program using run command
run main
and after the program starts running it will stop and wait for prompt at first breakpoint set by us in previous steps

There are three kind of gdb operations we can perform when the program stops at a break point.
  • c or continue: Debugger will continue executing until the next break point.
  • n or next: Debugger will execute the next line as single instruction.
  • s or step: Same as next, but does not treats function as a single instruction, instead goes into the function and executes it line by line.
below is the full operation in single screen

h2o@h2o-Vostro-1015:~/C$ gcc -o lab3 lab3.c -ggdb
h2o@h2o-Vostro-1015:~/C$ gdb lab3
GNU gdb (GDB) 7.5-ubuntu
Copyright (C) 2012 Free Software Foundation, Inc.
License GPLv3+: GNU GPL version 3 or later <http://gnu.org/licenses/gpl.html>
This is free software: you are free to change and redistribute it.
There is NO WARRANTY, to the extent permitted by law.  Type "show copying"
and "show warranty" for details.
This GDB was configured as "i686-linux-gnu".
For bug reporting instructions, please see:
<http://www.gnu.org/software/gdb/bugs/>...
Reading symbols from /home/h2o/C/lab3...done.
(gdb) list main
1    #include<stdio.h>
2    #include<stdlib.h>
3    int main()
4    {
5        char str[]= "s";
6        int a=5;
7        printf(a<10? "%50s\n":"%s\n",str);
8   
9    int i=2;
10    printf("\n%d%d\n",++i,++i);
(gdb) break 5    
Breakpoint 1 at 0x8048415: file lab3.c, line 5.
(gdb) run
Starting program: /home/h2o/C/lab3

Breakpoint 1, main () at lab3.c:5
5        char str[]= "s";
(gdb) s
6        int a=5;
(gdb) s
7        printf(a<10? "%50s\n":"%s\n",str);
(gdb) s
                                                 s
9    int i=2;
(gdb) s
10    printf("\n%d%d\n",++i,++i);
(gdb) s

44
12            return 0;
following relevant commands from Internet

gdb command shortcuts

Use following shortcuts for most of the frequent gdb operations.
  • l – list
  • p – print
  • c – continue
  • s – step
  • ENTER: pressing enter key would execute the previously executed command again.

Miscellaneous gdb commands

  • l command: Use gdb command l or list to print the source code in the debug mode. Use l line-number to view a specific line number (or) l function to view a specific function.
  • bt: backtrack – Print backtrace of all stack frames, or innermost COUNT frames.
  • help – View help for a particular gdb topic — help TOPICNAME.
  • quit – Exit from the gdb debugger.

Wednesday 25 September 2013

Buying Raspberry Pi in India

While the search for an electronic development board with both Ethernet and RS232 interfaces yielded not so encouraging results but this quest introduced me to something called "Raspberry Pi". for all the novices like me, Raspberry Pi is a small credit card sized computer board.more details
diving into the details and on reading great reviews by numerous experts on web made me wonder about the capabilities and the possibilities of utilizing the capabilities for my project( i.e. implementing an serial to Ethernet communication interface). so after finalizing the SBC with ARM11 chip (with consent of my project guide) the first step was to get a Raspberry Pi board. As it was launched quite earlier so lots of information is available about from where and how to order the board. But I had lots of confusion and I wanted to get the board at least price and within minimum time in India.

As already there are loads of information available on WWW about the pi, programming it, interfacing it, using it , etc. My focus in this blog is to present the options on buying(where I am facing the problems) and save the prospective reader from the trouble of lots of trolling  on online electronic stores, registering in on each of them  so on and so forth.

options available

One would require some cable, either HDMI or RCA in order to connect the Pi to the display, as I didnt have any HDMI TV and Pi doesnt have a VGA out, but in our College lab Projectors are available with RCA in, hence I also checked for an RCA Cable( when you buy board, you get only the board and nothing else.)


For Cable- INR 50
and Pi-       INR 3300
Shipping     INR 200
-----------------------
Total          INR 3550/-

Option 2 ModPi(UK)


 with current dollar to INR rates this seems to be the cheapest option available.
45.20( shipping+Pi) = INR 2825


from RSdelivers


on reading the fine print, found out that the vat, shipping etc. are all excluded. On calling the customer care( very prompt I must say) found out that the cost displayed 3230 is the cost if  they deliver in 2-3 weeks, but If someone wants it within 1 week then additional 12% would be applicable. on realizing that I am a student the kind customer executive told me to check out the Crazypi site as well for buying rasp pi.
there also the price was high with some extra shipping charges.

Finally after lots of surfing and eating up my data-plan I ordered on modmypi from UK and the order is  processed, costed me 2829 Cheaper than all the Indian alternative is assuring that the delivery would be made within 4-days. Keeping my fingers crossed and eagerly waiting for the Pi to arrive (after a very long time I am feeling like a kid waiting for some special gift :P.. if you know what I mean..;))

meanwhile I will be looking for ways to efficiently and easily program the Pi...


entry 4 Oct 2013
Today the Pi Arrived...