Generally setting up "an environment to work" is of utmost relevance which affects the outcome of the efforts we are putting in,it is the also an barrier which we need to overcome to indulge our curiosity and dwell further into something we are actually interested in.
objective -setting up an environment to begin Linux kernel programming
Things required- internet connection, basic knowledge of executing commands in terminal
I would recommend for the first one as it allows us to understand and learn how can a kernel be compiled from source.

note- even numbered versions are stable whereas odd numbered are the ones on which debigging and development is in progress. you can download any one of the even numbered linux kernel source code, I downloaded
now in terminal; navigate to the linux directory where source file is extracted and then run all the following commands as super user(SU) from same directory.
make defconfig and move on to next step)


after installing ncurses you can run make menuconfig, you will get the screen like following image

just for an example if u dont want to have wireless connectivity or network connectivity of any sorts for that matter, you can uncheck the box next to Networking support option.
reboot the system and select "advanced boot options" from boot menu and there you can see the additional option to boot into.
this new kernel will have exactly same interfaces as you had in your earlier version, to check the version, you can run uname -r command which will display the version.
now we have a separate kernel where we can add our own modules and experiment with it!
objective -setting up an environment to begin Linux kernel programming
Things required- internet connection, basic knowledge of executing commands in terminal
1. CHOOSE
there are two ways one can move,- Install a new kernel over the existing installation. pros of this option is that you will have a backup kernel to boot into in case your experiments with the kernel go awry and test kernel crashes. If you find yourself unable to boot into the experimental environment kernel), you can always boot into the kernel os which you were not fiddling with.
- Experiment with the existing kernel (the one running your OS right now!) one can go for this option if saving memory is prime concern and also if you want to start poking your nose into kernel right away without spending any time on setting test environment, but beware any wrongdoing on your part might result in os crash.
I would recommend for the first one as it allows us to understand and learn how can a kernel be compiled from source.
2. DOWNLOAD
- Download the kernel source code from https://www.kernel.org/
note- even numbered versions are stable whereas odd numbered are the ones on which debigging and development is in progress. you can download any one of the even numbered linux kernel source code, I downloaded
| mainline: | 3.16-rc4 | 2014-07-06 | [tar.xz] |
- Create a directory, preferably in home folder for ease of navigation in terminal
- move the downloaded tar.xz file in linux folder and unzip it using
now in terminal; navigate to the linux directory where source file is extracted and then run all the following commands as super user(SU) from same directory.
3. CONFIGURE KERNEL
(find it too lengthy and boring? then u can skip it by just running a commandmake defconfig and move on to next step)
"make" - Linux manual page says " The purpose of the make utility is to determine automatically which pieces of a large program need to be recompiled, and issue the commands to recompile them."
In case of Operating system which is a collection of large number of programs, when any modification is made (adding a device driver, removing a bug etc.) then to identify which modules need recompilation and for which it can be avoided, make utility is used.
make command searches for a file named makefile in the directory, this makefile has the information about file dependencies and contains the command to compile each file.
as we are compiling the kernel we need to "make" some of the files in order to compile the kernel source code.
configuration- as the word indicates it is configuring the kernel, what features you want in your new kernel and what you don't. for example wireless network support etc.
some of the options available to create the .config file which store the configuration
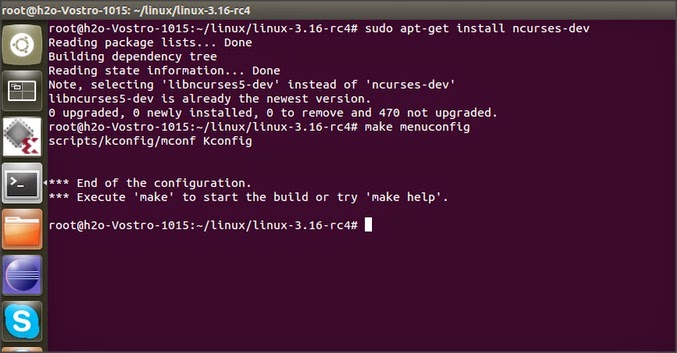
it presents an graphical interface to choose which options you want. if u encounter error while you run make menuconfig command then you need to install libncurses in your system,
you can install it using 
after installing ncurses you can run make menuconfig, you will get the screen like following image
just for an example if u dont want to have wireless connectivity or network connectivity of any sorts for that matter, you can uncheck the box next to Networking support option.
4. COMPILE
now that we have configure the basic settings and customized the things we want in our kernel/os with the help of configure step, we can move on to compiling the source code, compilation will be done according to the customizations that we have done in previous steps.
a. kernel
b. modules
c. install kernel modules
5. INSTALL KERNEL
6. CHECK
reboot the system and select "advanced boot options" from boot menu and there you can see the additional option to boot into.
this new kernel will have exactly same interfaces as you had in your earlier version, to check the version, you can run uname -r command which will display the version.
now we have a separate kernel where we can add our own modules and experiment with it!
This comment has been removed by the author.
ReplyDeleteI stuck at sudo apt-get install ncurses-dev
ReplyDeleteerror : 404 Not Found [IP: 91.189.92.201 80]
to overcome this try following command
1) sudo gedit /etc/apt/sources.list
and change souce page(url) to old-releases.ubuntu.com
2)
You need to run
sudo apt-get update
after you change the urls to old.releases.ubuntu.com to update the package list